Multigrain Rotis: Flatbreads made of Different Types of Grains
- Away in the Kitchen

- Feb 8, 2021
- 7 min read
In 1925, American writer and journalist, Janet Flanner, who served as the Paris correspondent of the New Yorker, started writing a column, Letter from Paris. These were later collected into a book, Paris was Yesterday 1925-1939. In one of those letters, Janet says, "In the history of art there are periods when bread seems so beautiful that it nearly gets into museums" and I couldn't agree more, even though she is talking about bread different from the ones made in Indian kitchens.
Growing up in an Odia family in India, where rice is a preferred in the meals, roti, the commonest flatbread I ate at home, was mostly served at breakfast or dinner or packed in lunchboxes.

I must have been 5 years old or younger when I sat against one of the tall pillars in the porch attached to our backyard at dinnertime. Mother tore a roti into pieces, soaked them in a bowl of yellow dal, and fed me mouthfuls as she told a story to have me sit steady. I easily got distracted to swing on the wooden horse, and she quickly rolled the greens or vegetables into another roti and let me take a bite every now and then without letting me wander too long. I was hungry as a child, for stories more than food, and mother never ran out of either.
When I started going to school, her rotis and parathas (flatbread roasted with oil or ghee) found their way to my compartmentalized steel tiffin box. As I grew up, I watched her closely while she worked with the dough—how she brought the flour together effortlessly judging and adding water without any measuring cups or scales. I remember she often let me play with some flour or dough as I sat outside the kitchen as a child, not budging from her side while she prepped, cooked and cleaned. I watched the dough being rolled into round breads, a dusting of flour to keep the momentum going and plunked on the hot griddle. In seconds, the colour changed and mother turned the side, pressing the edges to let it puff and swell. The last leg of the roti was on the open flame of the stove, where it charred and cooked fully and then got served on the plate.
I moved to Bombay when I was 18 and lived in a hostel where rotis still made an appearance on the meal plates in different forms: chapatis, tandoori rotis, kulchas and more. At 20, I found a new home with an old Punjabi lady, and found roti in almost every meal I ate. "Roti khayi?" is what my Punjabi Auntie A would ask everyday before I left home for college or before I went to bed. Literally translating to "Ate bread?", "Roti Khayi?" actually implies, "Did you eat?" because roti is not just bread in a Punjabi household. It defines a meal. Living amidst people whose food was indescribable without rotis, my appetite and interest flourished in the art of making Indian flatbreads.


I love the feel of the flour on my fingers, and working the dough with my bare hands is therapeutic. But this wasn't always the case. The first rotis I ever made were terrible. Auntie A supervised and helped me a lot to understand how water works with different kinds of flour, how one has to gently roll the belan on the sides of the dough so it turns on its own on the chakla, and the more I practiced, the better my rotis became. Kneading a dough is meditative, and there's a certain calmness I feel repeating the process of pulling and combing it together. Many would find this rather exhaustive, even messy. There's a way around that too, and if you read the tips and the process below, you wouldn't shy away from working a dough next time.
Although wheat is thought to be the most common grain to make flatbreads in India, there are several other grains and millets that are ground and used to make breads in different communities throughout the country. Several gluten free alternatives like rice, sorghum, buckwheat, maize, pearl millet are ground into flour and used to make rotis from ancient times. Ever since its domestication in the Fertile Crescent, we have heavily relied on wheat and that has resulted in a shrinking list of crops for the bulk of our diet. Our food systems are becoming increasingly unstable as a consequence.
A more homogeneous global food basket makes agriculture more vulnerable to drought, pests and diseases, which will be exacerbated by climate change, says Luigi Guarino, a co-author and senior scientist at the Global Crop Diversity Trust, in Germany.
I grew up eating wheat rotis predominantly. However with exposure to greater variety of flatbreads made of other grains and millets in different cultures in India and around the world, I tend to include multigrain rotis in my diet than only wheat. A non-glutinous dough is trickier to knead and roll than a wheat flour dough. However, using different flours in combination with wheat eases the process of making the dough and rolling the flatbreads, not to mention the diversity it introduces in our food basket and helps in reducing sole dependency on wheat.
The process...
There are 3 stages to making a dough for an Indian flatbread:
Mixing: Add any dry ingredients you'd want to add to your dough. For example, if you're using salt or spices to flavour your dough, first add them into the flour and mix everything with your clean hands. Then, add water in small doses and move your hands in circular motions in the bowl to mix water with the dough.
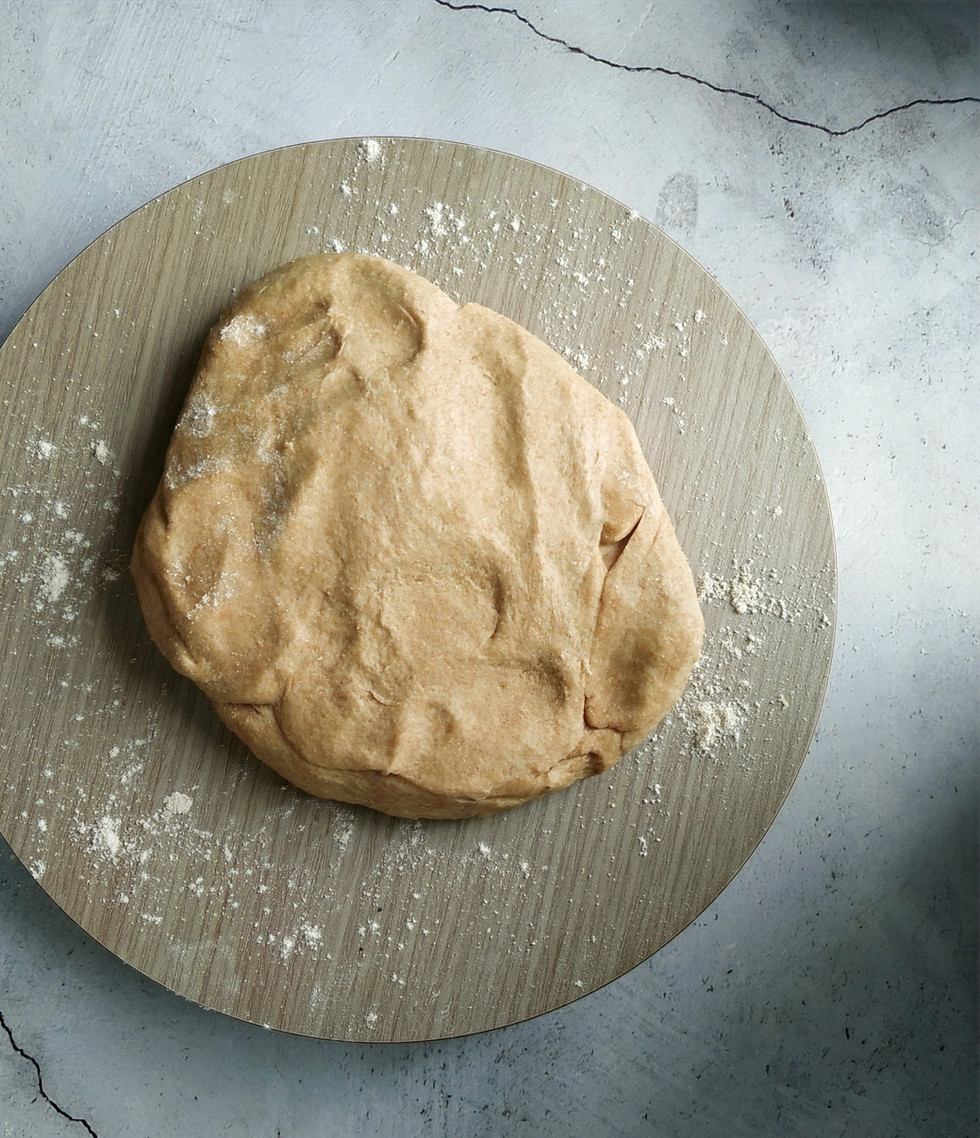
Combining: Keep adding water as needed, and now bring together the flour to combine with water and form a roughly shaped ball. There's no kneading at this point of time. The aim is to form a pulpy ball of flour and clean the bowl of any remaining flour.
Kneading: You may want to slightly wet your hands at this stage or apply some oil on your fingers to get rid of any dough sticking onto them. Now gently pat the dough and apply mild pressure on the dough with the heal of your hand (the portion where your palm ends and wrist begins), stretch it and fold it back. Continue this process until the dough is a smooth and soft ball.


Pro Tip:
If you're new to working with flour and making flatbreads, I recommend introducing water in small doses than adding all of it in a go.
For example, if you're using 1 cup of flour to make a dough for rolling flatbreads later, you'll need roughly about 1/2 cup of water or lesser. But wait! Don't add all the water into the flour. First, bring the flour together into a roughly combined ball by adding about 1/4 cup of water at a time. Once the flour is mostly combined, wet your hands and wipe the sides of the bowl with the loosely formed dough to clean all the remnant flour.
After kneading a smooth dough, cover it with a wet cloth and set aside for at least 20 minutes to half an hour before you start making the rotis.
While cooking the rotis on the griddle, always let one side of the roti cook before turning its side. This is indicated by a change in colour of the roti. You must change the sides of the roti as soon as the colour changes, and not let it sit on the griddle too long. Otherwise, your rotis will turn hard.
To help the roti puff up, gently press the sides with a clean cloth or a wooden spatula.

Recipe
Note: You may use the same recipe to make only wheat flour rotis also. Just replace the other flours with wheat and follow the same process.
Ingredients1/2 cup wheat flour
1/4 cup sorghum flour
1/4 barley
2 tbsp buckwheat flour (optional)
a small pinch of salt (optional)
1/2 cup water + extra as needed
MethodIn a large bowl, add all the flours and salt, and mix with your clean hands.
Now start adding water in small doses (about 1/4 cup at a time) to form a loosely combined dough. Wet your hand with water or apply some oil on your fingers, hold the loosely combined dough and rub and wipe clean the sides of the flour for any remaining flour.
Start kneading the dough, applying pressure with the heal of your hand to stretch and fold it to form a smooth and soft dough. Cover the bowl with a wet cloth and set aside for 20 to 30 minutes.
Open the bowl, knead the dough again for about 2-3 minutes and make lemon sized balls out of it. Keep some flour for dusting ready.
Place a griddle on medium to high heat and let the griddle become hot. This is faster if you have an open flame gas stove. On an electric stove, this can take about 5-7 minutes.
While the griddle is heating, take a lemon sized dough ball, dust some flour on the rolling surface/board and using a rolling pin, roll it flat to form a small circle. Dust the dough again and continue rolling, applying pressure on the sides and corners and turning the circular roti around as needed. To estimate the size of the circle, keep your palm on the flatbread midway to get an idea how big a circle you want.
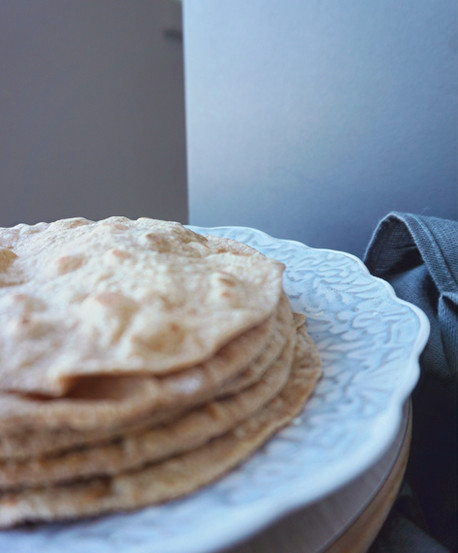
Lift the roti and pat it to let go off any remaining flour, and place it on the hot griddle. In a few seconds, the colour of the roti will change. Turn its side. Once you see blisters on both surfaces, your roti is cooked through. At this stage, if you have an open flame gas stove, you can lift the roti with tongs and roast it on the fire for a few seconds on both sides. If you have an electric stove, you can place a steel wire roaster on the heated coil or plate of the stove, place the roti on it and roast it by holding with tongs.
Repeat the steps 6 and 7 for all the lemon sized dough balls. Serve right away or wrap all the rotis in a clean cloth and keep at table just before serving.


Comments